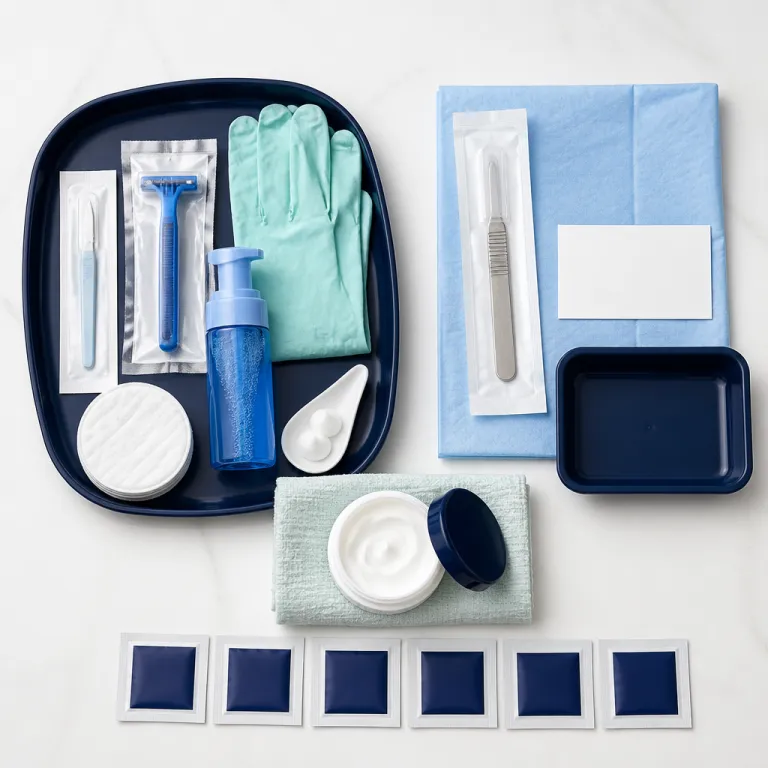
Why dermaplaning moved from spa secret to bathroom ritual
Dermaplaning has quietly shifted from niche facial treatment to a regular home ritual for beauty lovers who want glass like skin. In this dermaplaning at home guide, we will look at how a simple blade and a precise technique can remove dead skin cells and vellus hair while still respecting a luxury level skincare routine. The goal is not a fleeting trend but a safe effective way to keep skin smoother, brighter, and ready for the most refined makeup application.
At its core, dermaplaning is a controlled form of hair removal that uses a single sharp blade held at about a 45 degree angle to gently skim the face. This movement removes dead skin from the surface, takes away peach fuzz and other facial hair, and helps smooth rough texture without relying on acids or scrubs that can overwhelm sensitive skin. When done correctly, dermaplaning removes dead cells so that skincare products penetrate better and makeup sits closer to real skin, not on a layer of dull buildup.
Luxury clients often first meet dermaplaning in a spa or dermatology office, where a professional uses a medical grade dermaplaning tool that looks and feels different from a disposable home dermaplaning razor. That professional treatment can be ideal for reactive skin types or anyone nervous about side effects, while a carefully planned dermaplane home routine suits those who already understand their skin and skincare products well. This article will read like a beauty editor level roadmap, helping you decide when to use a home dermaplaning tool, when to book a facial, and when to let your skin avoid the trend entirely.
What dermaplaning really does to your skin and makeup
Think of dermaplaning as couture tailoring for your face, not a quick shave. The blade glides over dry skin and removes dead skin cells and fine vellus hair in a single controlled step, which instantly makes the surface feel softer and look more even under natural light. Because this treatment removes dead cells without chemicals, it can brighten dull areas while keeping skin better balanced for those who dislike strong peels.
Once that layer of dead skin and peach fuzz is gone, your skincare routine works harder for you, not the other way around. Serums and creams no longer sit on top of dead skin but reach fresher skin cells, so active ingredients like vitamin C or niacinamide can perform closer to their potential. Many luxury clients notice that their usual skincare products feel more potent after a dermaplane session, which is why this dermaplaning at home guide emphasizes spacing the treatment correctly within your routine.
Makeup lovers see another clear benefit, especially if they prefer sheer bases and skin like finishes. Foundation and tinted moisturiser glide over a dermaplaned face without catching on facial hair, so even minimal coverage looks more polished and less textured in daylight. If you care about refined details like a watercolor blush effect or a diffused contour, pairing dermaplaning with a modern technique such as the couture level smile and complexion rituals can make every stroke of product look more intentional and less effortful.
Tools, textures, and the right kind of blade for home dermaplaning
Not every sharp tool belongs near your face, and that is where many home dermaplaning attempts go wrong. Professional dermaplaning uses a sterile surgical blade in the hands of a trained expert, while at home you should reach for a purpose built dermaplaning tool or a high quality disposable facial razor designed for vellus hair. This dermaplaning at home guide focuses on tools that feel gentle in the hand yet precise enough to remove dead skin without tugging.
Look for a dermaplaning tool with a single guarded blade, a non slip handle, and a slight curve that follows the natural lines of the face. A good tool lets you control pressure so you can keep skin safe, avoid nicks, and glide over contours like the jaw and cheekbones without hesitation. Replace blades or disposable tools often, because a dull edge drags on skin cells, increases side effects, and makes the treatment feel more like scraping than a refined facial ritual.
Texture matters in your supporting skincare products as well, especially if you love luxury formulas. Before you dermaplane home, cleanse with a low foam gel or milk that leaves the skin comfortable rather than tight, then dry the face completely so the blade can move cleanly. Afterward, reach for a featherlight hydrating serum and a cushiony cream, then finish with a soft focus tint or a modern watercolor blush style flush that shows off how smooth rough patches have become.
Step by step: a safe effective dermaplane home ritual
Preparation is the quiet luxury of any good skincare routine, and dermaplaning is no exception. Start this step by step ritual in the evening at home, when you can take time to read your skin and respond to it rather than rushing before work. Remove makeup completely, cleanse twice if needed, then pat the face dry until there is no slip left on the surface.
Hold your dermaplaning tool in your dominant hand and keep the other hand free to gently stretch the skin. Place the blade at about a 45 degree angle to the face, then use short, featherlight strokes downward, working from the outer cheek toward the centre and avoiding active breakouts or irritated areas. The goal is to remove dead skin and peach fuzz in a controlled way, not to chase every last facial hair until the skin protests.
Move methodically across the forehead, cheeks, and jawline, but do not go over the same patch of skin cells more than once or twice, because repetition increases side effects like redness or micro cuts. Skip the nose and eyelids, and let the skin avoid any area that feels hot, itchy, or overly sensitive as you work. When you finish, rinse with cool water, apply a calming serum and a barrier focused cream, then commit to broad spectrum SPF the next morning to keep skin better protected while it is newly exposed.
Who should dermaplane at home, and who should see a professional
Not every luxury skincare lover needs a dermaplaning at home guide, because not every skin type should be dermaplaned in the bathroom. Normal to dry skin that feels a little rough, looks slightly dull, or carries a veil of peach fuzz often responds beautifully to a gentle dermaplane routine once or twice a month. These clients usually notice that hair removal of fine vellus hair makes their beauty products sit more evenly and that their skin looks subtly brighter without extra highlighter.
On the other hand, anyone with active acne, inflamed rosacea, or very reactive skin should book a professional treatment or skip dermaplaning entirely. A dermatologist or licensed aesthetician can read your skin in real time, adjust the angle of the blade, and decide whether a different facial treatment would keep skin safer and calmer. If you use prescription retinoids, have a history of keloid scarring, or have recently had in office procedures, a professional will also time dermaplaning around those treatments to minimise side effects.
There is also a group for whom a professional dermaplane is more about precision than safety. If you invest heavily in skincare products and high performance makeup, or if your work involves constant close up cameras, a clinic level dermaplaning tool can create a more uniform canvas than most home dermaplaning options. For a deeper look at how aesthetic choices intersect with luxury beauty ideals, you can read this analysis of how body and face trends shape modern routines in the context of reshaping luxury beauty ideals, then decide where dermaplaning fits into your own standards.
Common mistakes, side effects, and how to keep skin calm
Most dermaplaning mishaps come from impatience, not from the tool itself. Pressing the blade too hard, working on damp skin, or going over the same area repeatedly turns a safe effective technique into a rough scrape that can damage skin cells. When you dermaplane home, think of it as a whisper light polish, not a deep scrub, and let the blade do the work instead of your wrist.
Short term side effects can include mild redness, a feeling of tightness, or tiny nicks, especially if you rush around the jawline or upper lip where facial hair can be slightly thicker. To keep skin calm, avoid chemical exfoliants such as strong acids or retinoids for at least forty eight hours before and after your dermaplaning routine, and lean on hydrating skincare products with ingredients like glycerin, ceramides, and centella. If you notice persistent stinging, visible scratches, or breakouts after several sessions, pause home dermaplaning and consult a dermatologist rather than pushing through discomfort.
One persistent myth is that shaving or dermaplaning makes facial hair grow back thicker, which is not supported by current dermatology research. The blade cuts vellus hair bluntly at the surface, so as it grows it can feel different to the touch, but the hair itself does not change in colour or diameter. The real test is not the Instagram filter but the mirror test the morning after ; if your skin looks smoother, your makeup application feels easier, and your face feels comfortable, your technique is working for you, not against you.
Post dermaplaning luxury: how to build a supporting skincare and makeup wardrobe
Once you have removed dead skin and peach fuzz, your face becomes the ideal canvas for a curated skincare routine and a restrained makeup wardrobe. This is the moment to reach for your most elegant serums and creams, because freshly dermaplaned skin absorbs skincare products more efficiently and shows texture changes more clearly. Think of this dermaplaning at home guide as the prelude to a ritual where every product earns its place.
Immediately after the treatment, focus on hydration and barrier support rather than actives. A fragrance free hydrating serum, a mid weight cream, and a generous layer of SPF the next morning will keep skin better protected while it adjusts to the absence of dead skin cells on the surface. Over the following days, you can reintroduce gentle exfoliants or retinoids if your skin tolerates them, always watching for signs that you should let the skin avoid extra stimulation.
Makeup should feel lighter, not heavier, on a recently dermaplaned face. Sheer bases, cream blushes, and finely milled powders sit closer to the skin and show off how smooth rough patches have become, while heavy full coverage formulas can sometimes highlight any remaining dryness. Choose products that respect the work your dermaplaning tool has done, and treat each dermaplane session as a reset button that lets your beauty routine feel more intentional and less crowded.
Key figures on dermaplaning and exfoliation habits
- According to the American Academy of Dermatology, surveys show that more than 40 % of people who exfoliate at home report using physical methods such as scrubs or blades, which highlights why clear guidance on safe effective dermaplaning is necessary.
- Dermatology clinics report that professional dermaplaning treatments are often scheduled every three to four weeks, aligning with the average twenty eight day skin cell turnover cycle and helping prevent over exfoliation.
- Consumer research from major beauty retailers indicates that searches for at home facial hair removal tools, including dermaplaning tool options, have grown by double digit percentages over recent years, reflecting the shift from in office to home dermaplaning.
- Clinical studies on physical exfoliation methods suggest that when performed correctly no more than once or twice per month, dermaplaning does not increase long term sensitivity for most normal to dry skin types, but overuse can compromise the barrier.
FAQ: dermaplaning at home for luxury skincare lovers
Does dermaplaning make facial hair grow back thicker or darker ?
No, dermaplaning does not change the structure, colour, or growth rate of vellus hair or other facial hair. The blade cuts hair bluntly at the surface, so as it grows it can feel slightly stubbly, but the hair itself is not thicker. If you notice dramatic changes, consult a dermatologist to rule out hormonal causes rather than blaming the dermaplane routine.
How often can I safely dermaplane at home ?
Most normal to dry skin types do well dermaplaning once every three to four weeks, which matches the natural turnover of skin cells. More frequent sessions can remove too much dead skin and increase side effects like redness or sensitivity, especially if you also use acids or retinoids. If your skin feels tight, looks shiny but not in a healthy way, or stings when you apply products, extend the gap between treatments.
Can I dermaplane if I use retinol or other active skincare products ?
You can often combine dermaplaning with retinol or other actives, but timing is crucial. Stop strong exfoliating acids and retinoids for at least forty eight hours before and after your dermaplaning routine to keep skin better balanced and reduce irritation. If you use prescription strength retinoids or have a history of sensitivity, ask your dermatologist before adding home dermaplaning.
Is dermaplaning suitable for sensitive or rosacea prone skin ?
Very sensitive or rosacea prone skin often reacts poorly to at home dermaplaning, because the blade can trigger flushing, micro tears, or flare ups. In these cases, a professional treatment or a different form of gentle exfoliation may be safer. If you still want to try dermaplaning, start with a consultation and possibly an in office session under expert supervision.
What should I apply immediately after dermaplaning to keep skin calm ?
Right after dermaplaning, focus on hydration, barrier repair, and sun protection. Use a simple hydrating serum, a non fragranced moisturiser, and avoid strong actives for a couple of days, then apply a broad spectrum SPF every morning to protect the newly exposed skin cells. This combination helps maintain results, keeps side effects minimal, and lets your makeup application look smoother for longer.
References
- American Academy of Dermatology Association – guidance on exfoliation and hair removal methods.
- American Society for Dermatologic Surgery – information on professional dermaplaning and in office treatments.
- Cleveland Clinic – patient education resources on shaving, dermaplaning, and skin barrier health.